
Prepare and submit a claim
Available to
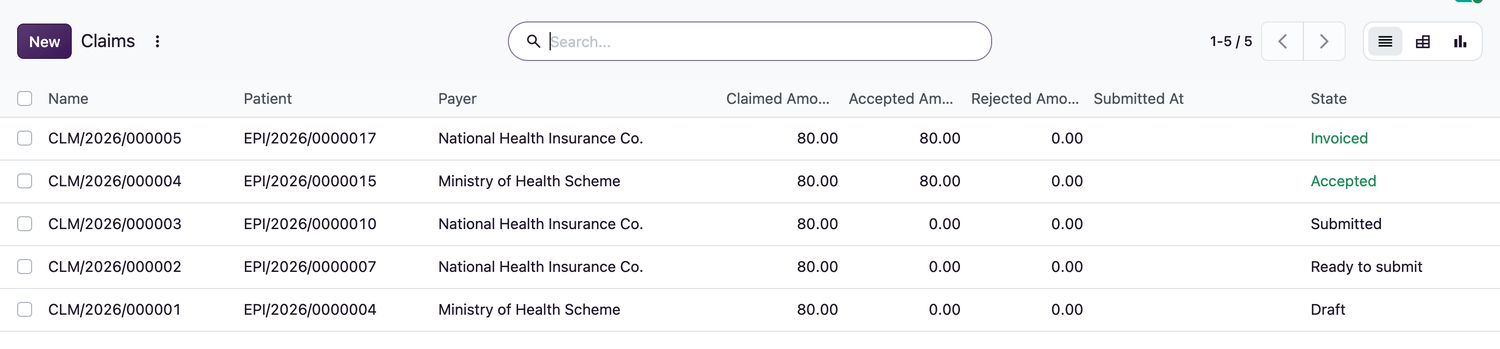
Billing officers.A claim bundles the covered services of an encounter and sends them to the payer. It moves through fixed steps, and each step has its own button.
Draft → Ready to submit → Submitted → Accepted / Partially accepted / Rejected → Invoiced
From draft to invoice
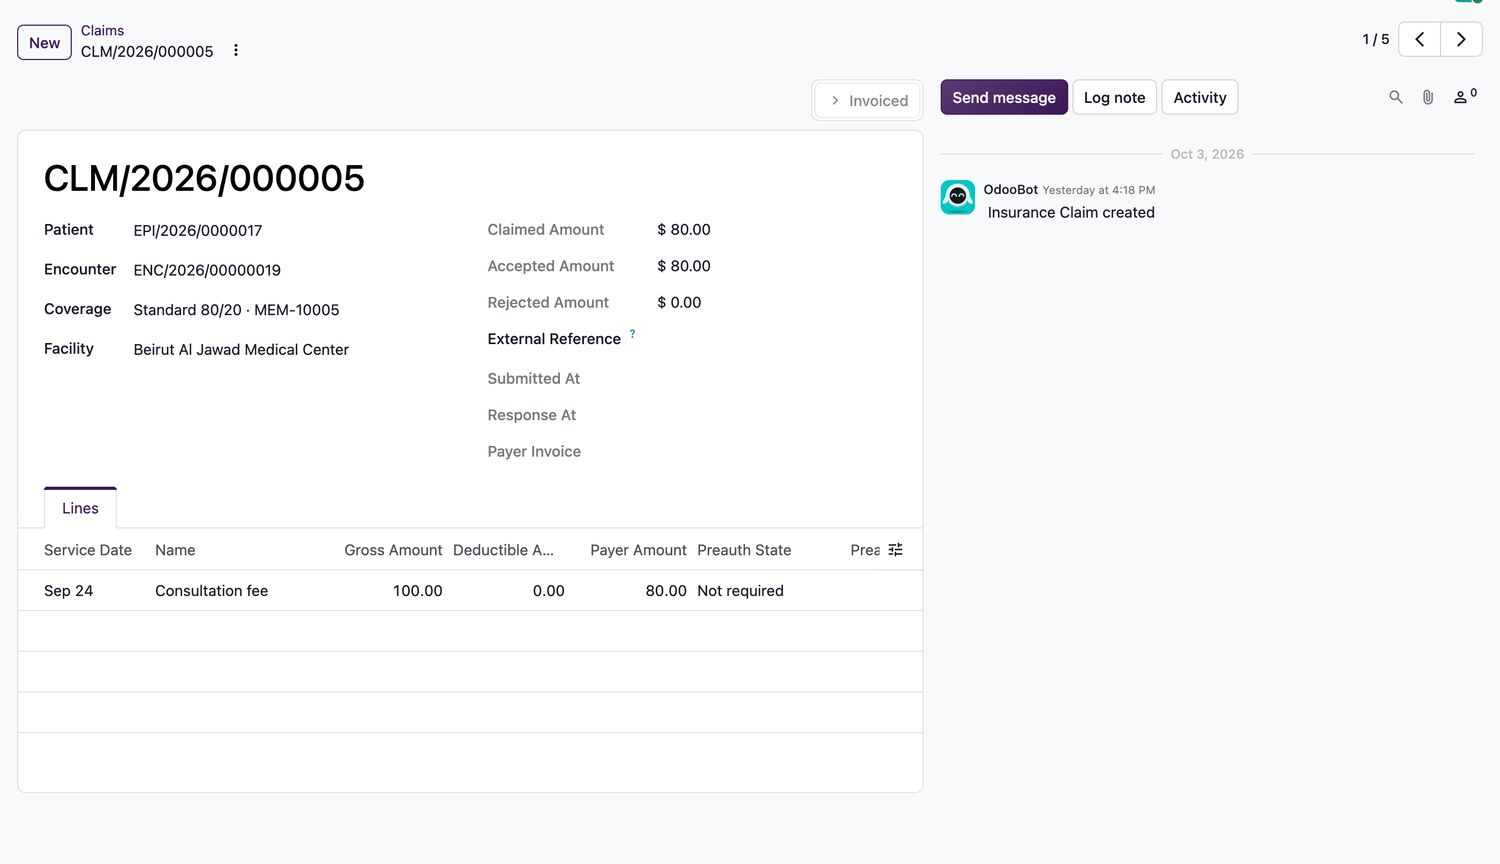
- Open Insurance → Claims. A draft claim is created automatically for each encounter and coverage when a service with a payer share is charged. Open the claim and check its Lines tab.
- Select Mark Ready. The claim must have lines and something to claim (not all within the deductible or uncovered).
- Select Export CSV or Export FHIR JSON if the payer takes a file.
- After you submit it to the payer, select Mark Submitted. Only a ready claim can be submitted.
- When the payer answers, set the result on every line (accepted amount or rejection) and select Apply Payer Response.
- For an accepted or partially accepted claim, select Create Payer Invoice. Only one invoice can be created, and only for accepted amounts.
Good to know
- Use Back to Draft to correct a ready claim, and Cancel for a claim that was not submitted.
- An accepted amount cannot exceed the claimed amount.
- If a service is cancelled after the claim was submitted, the system voids the line and asks you to request a credit from the payer.
- The claim filters are Draft, Ready, Awaiting Payer, Rejected / Partial, Payer and Status.
Related topics
Was this helpful?
Thank you. Your feedback is recorded.Thank you. Tell us what is missing so we can fix this guide.
Report an issue with this guide