
Create and schedule an imaging order
Available to
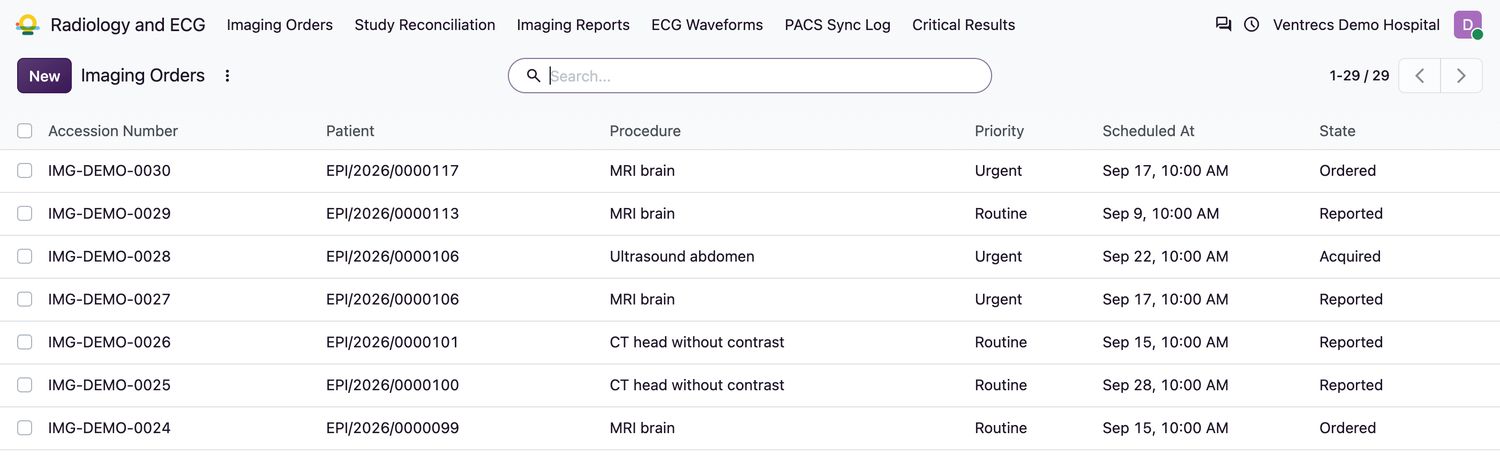
Clinicians create the request; radiology users schedule it.An imaging order is a radiology or ECG procedure requested for a patient. It is scheduled, published to the imaging equipment as a worklist, acquired, and finally reported.
Ordered  →  Scheduled  →  Worklist Published  →  Acquired  →  Reported
                         (an order can be cancelled with a reason before it is reported)
Order and schedule
- The clinician creates and activates an Imaging (or ECG) clinical order. See Create and manage clinical orders.
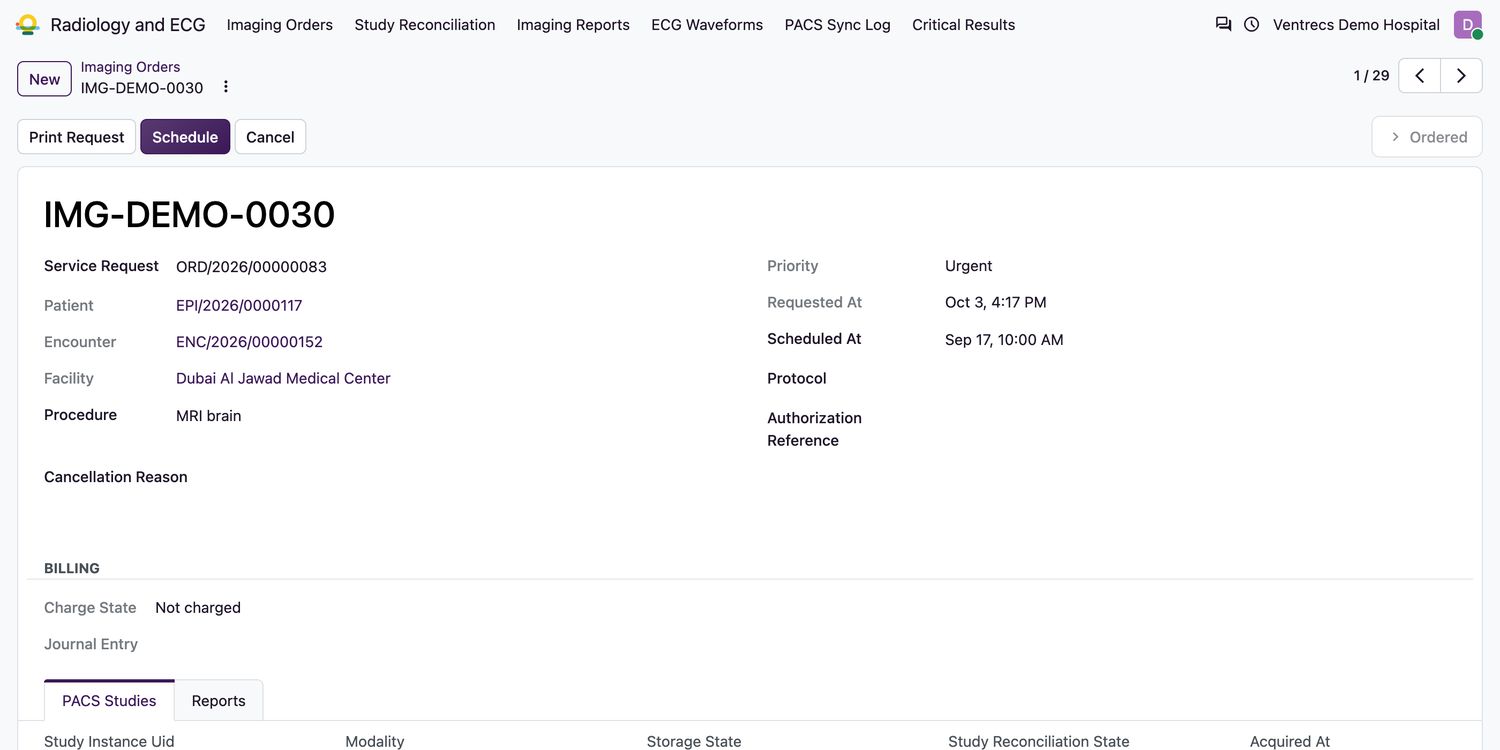
- Open Radiology and ECG → Imaging Orders and select New. Choose the Service Request and the Procedure (for example Chest radiography, CT head without contrast, MRI brain, Ultrasound abdomen).
- Set the Priority, and enter the Protocol and Authorization Reference if your payer needs one. Save. The order is
Ordered. - Enter the Scheduled At time and select Schedule. A scheduled time is required.
- Select Publish Worklist so the imaging equipment receives the patient and procedure. The order becomes
Worklist Published. - Select Print Request to print the request form for the patient.
Good to know
- An ECG service request needs an ECG procedure.
- The procedure must be configured for the facility.
- To cancel an order, enter the Cancellation Reason and select Cancel.
- When the patient is imaged, the study arrives from the picture archive and links to the order by its accession number; the order becomes
Acquired.
Related topics
Was this helpful?
Thank you. Your feedback is recorded.Thank you. Tell us what is missing so we can fix this guide.
Report an issue with this guide